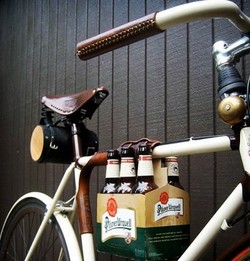
If there is one area I love to preach on, it's being self sufficient on your bike. My challenge is to get you confident to handle the majority of breakdown situations while out on a ride. For this, the first thing you will need is a basic spares kit to help you get out of trouble.
Now there are a couple of ways to carry your spares depending on what is practical or what looks cool. I will give you the options and let you decide.
What are your options?
First option and the most common and practical one is to purchase a saddlebag. As the name suggests it sits under your saddle. There are a couple of different retention systems with the most popular being the Velcro strap.
There is also quick release version that has the mount installed under the saddle on the rails. Either system works well but I find quick release a bit simpler to use.
There are a variety of sizes depending on how much you want to carry and on the type of bike you ride.
Mountain and Touring style bikes have larger sized tubes, so will need a larger bag to accommodate this and the other tools you will require for the trail.
Road bikes have a thinner tube and require a smaller bag, making them a popular variety for the weight concious.
The second option is a spares tube. This is not actually a spare tube as the name suggests, but a plastic bottle with a screw lid keeping the contents dry and free from road grime.
The only downside to this is that it mounts in your bidon cage; if you are planning on a long ride you will be limited to only one bidon cage and may not be able to fit a water bottle as well. Not a huge issue if you know you'll have water available at stops along the ride.
For touring style bikes they normally are fitted with more than two bidon bolt fittings to enable the rider to carry more water.
Under the down-tube is a popular place for frame manufacturers to add bidon bolts - this area is more suited to mounting a spare tube.
Contents of your spares:
I always carry in my saddlebag 2 spare tubes for those pesky punctures, a set of tyre levers, which normally come in a set of 3, a small multi-tool and a CO2 gas pump to inflate my tyre once I have installed the new tube.
On more than one occasion I have required the use of both spare tubes so I never leave home with less than two. Always ensure you purchase the correct sized tube as getting a flat is bad enough, but finding that you have the incorrect tube size in your spares kit leaves you feeling a little embarrassed.
There are a variety of multi-tools on the market with an array of features. Depending on your mechanical skills most of you will only require the basic model.
For those of you with advanced skills you can look at the models that incorporate a chain tool. This allows you to break your chain to remove a stiff link, shorten your chain if you happen to bust your rear derailleur off and more, making it quite a handy part of your kit.
Tyre levers
Tyre Levers are an essential part of your spares kit. They commonly come in a set of three with various styles available. Unlike the old steel versions from years ago, they are now made of plastic so that they are lighter, and more forgiving on modern Alloy rims.
I find the tyre levers that incorporate a hook on the end easier to use. This hook is designed to hook onto the spoke, leaving your hands free to insert the next lever.
CO2 pump
I fought this for along time until I used it, then wondered why I took so long to come around to giving it a go. Simple to use, the CO2 gets you back on the road in no time. This is especially useful when you are in a race where every second is crucial.
Small enough to fit in any bag or spares tube and light enough to not put too much weight onto your bike for those who care! You know who you are!
The other option to inflate your tyre is a frame fit pump. These pumps come in a variety of sizes but their main function is to get you out of trouble. They are commonly mounted on under the bidon cage sharing the same bolts as your bidon cage. it sits neatly along either the seatube or downtube depending on your taste.
The $5 trick
Well it could be any amount but I like to call this one my $5 trick. When repairing a puncture you'll often need to slice a tyre open enough to see the tube inside. You will then need to put a sleeve in between the tyre and the new tube to avoid getting another puncture. A $5 note serves this purpose well. (Note: This applies more to the plastic Australian currency - not recommended for paper currency such as USD or Euro.)
I have used this on numerous occasions and it has gotten me home. It's obviosly also handy in case you need to buy yourself something to eat or drink when struggling on a long ride.
The last item is optional! Though again I have used it on more than a couple of occasions. The mobile phone is known as my third tube. If and when I ever run out of tubes I can always make a call to arrange a lift to get me home. With the technology these days, the other benefits are the ability to map your ride and record your training through the phone's apps.


