
There are many happy cyclists out there right now with a shiny new toy from Santa! If this is your first 'real' bike you may not realise the importance of a correct setup in getting the most performance, pleasure and safety from a brand new two wheel machine.
For all those riders new to performance cycling, (or just riding a bike in general), this list will help you get the most from your bike and keep you safe on every ride.
TOOLS REQUIRED:
- Torque wrench
- Chain lube
- Floor pump
- Allen keys
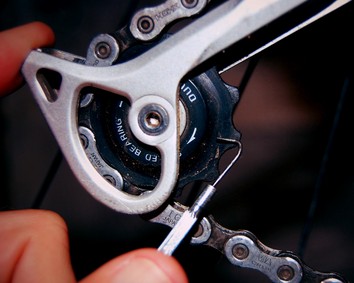
1. Torque wrench the bolts
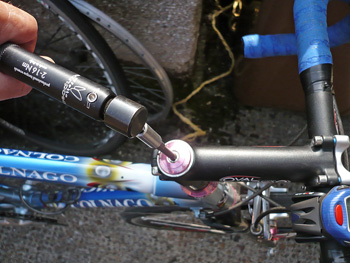
image: thewashingmachinepost.net
If you buy from a good local bike shop this should already be done, but when purchasing a top dollar bicycle it is a good idea to save some money for your own torque wrench, particularly if you have a carbon frame or components. This tool allows you to check any bolts that may come loose and is particularly useful when fine tuning your riding position, (change seat height, handlebar position or stem height), as it allows you to tighten bolts to specification so you don't overdo it and cause damage.
It is worthwhile as well to periodically check bolts. This is also a crucial part of basic mountain bike suspension maintenance - make sure those links are always nipped up!
2. Bike fit
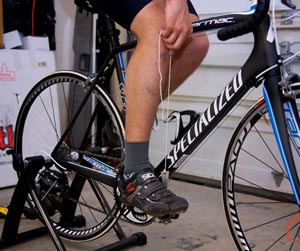
This is also a service offered by most reputable bike dealers with a new bike purchase and can range from a quick look-over to an expensive computer monitored system. What you need relates to how you ride your bike. A casual rider probably doesn't need to be hooked up to a computer, (for newbies a quick saddle height adjustment is a handy place to begin), but an advanced rider, pumping out hundreds of miles every week, would benefit greatly.
We have some simple bike fit techniques you can do at home here:
- "Bike Fit: Getting saddle height right"
- "Bike Setup: The benefit of a professional "shop fit" and some DIY alternatives"
- "5 ways to increase power and eliminate pain!"
3. First lube
From new your bike chain will have a sticky substance on the chain. This isn't lubricant, it is just in place so the chain doesn't rust in storage. Your first job with a new bike is to apply a light amount of lubricant to the chain until it runs smoothly and feels slippery when running through your hand.
Ditch the WD40 and get a bike specific chain lube. Less mess, less road grime and smooth running is the result. Check out "How to clean and lube your chain in 5 steps" for a rundown on correct use.
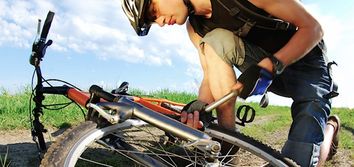
4. Tire pressure check
With your floor pump check tire pressure before every ride - not just the first one! On a road bike you will want somewhere around the 100psi mark. This allows a good balance between rolling resistance and grip and also helps prevent punctures.
Tire pressure on a mountain bike is a book in itself and depends upon many factors - including whether you run tubeless, trail conditions and your riding style. Generally no terrain will warrant more than 40psi and if you run tubeless you can actually go below 30psi! For those just starting out on a new mountain bike remember - if you are having trouble getting grip or just feel like you're bouncing around then let air out of the tires.
RELATED ARTICLE:
Understanding bicycle tire pressure
Everybody has their own opinion on tire pressure. There are so many parameters to take into account when finding your optimum tire pressure that it would almost be impossible to know exactly what to run... READ MORE
5. Position brake/gear levers

image: sandiegomountainbikeskills.com
Another one for the new mountain bikers out there. Check that your brake and gear levers are not too tight. In a crash you want them to be able to rotate on the bar rather than being anchored like concrete and snapping. Nip them tight enough so they don't move when riding, but make sure they can rotate in a heavy impact.
It is best to position the brake lever so your finger can operate the last inch or so of the lever. This may require sliding it inboard from the edge of the grip. The angle of the lever should line up approximately with your arms.
Once this is sorted you can position the gear lever so it is easily reached without interfering with your grip on the bars.
Road bikes are a bit more complicated as any adjustment here requires removing the handlebar tape then rewrapping to complete. Road levers should be positioned so the brake levers are reachable while riding in the drops and also remain comfortable when on the hoods. This may be one for the local bike shop to sort out if you are unaccustomed to bar wrapping.
6. Check quick release
Yes, the bike shop would have checked this but it is a good habit to get into before riding anyway. Open the QR lever, check the bike dropouts are sitting in straight and that the wheel is centred between the stays and fork - then tighten.
Quick release mechanisms are a very secure fitting so don't think you need to channel the power of Greyskull to tighten them enough. Just a good solid engagement is all that is required. If you need a tool to open the lever again you've gone too far!
7. Equip your ride
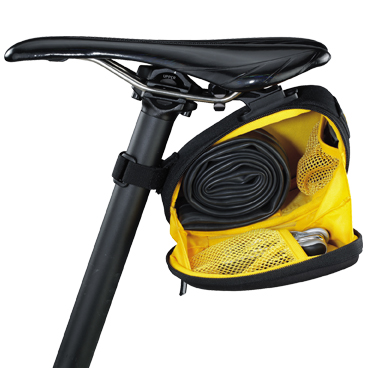
image: topeak.com
Equipping yourself, not just your ride is important as well. Always carry the essentials when heading out riding whether it is road or mountain. A saddle bag with essentials like: spare tubes, pump, mini tool is a starting point for longer, self-sufficient, riding.
Mountain biking often requires a hydration pack with room for all this equipment, plus a mini tool with extra features like a chain tool and also a larger volume pump and perhaps a shock pump for on the trail adjustments.
Once you have these steps sorted you have gone a long way to having a safer more enjoyable ride. Get into the habit of running through these steps before heading out and it will soon become second nature.
RELATED ARTICLE:
How to clean and lube your chain in 5 steps
Most of us can't often be bothered cleaning and lubing our bike chain, yet by following these 5 simple steps the job can be done quickly and easily... READ MORE