In the bikeshop I found that handlebar tape is an often neglected bike part. It would be as follows... Bike is left with us for a sevice, then when the service is complete the inevitable call to the owner: "Bike's done, hey do you want us to replace the bar tape while we're at it?"
If you're unsure, your local bike shop is the best place for handlebar tape replacement. If you're keen to learn, ask if you can watch the installation of the tape. It is a simple job, but your shop can highlight some simple tricks to make it so much easier and help give it a pro finish. Find your local bike shop here.
So how do you know it's time to rewrap the bars?
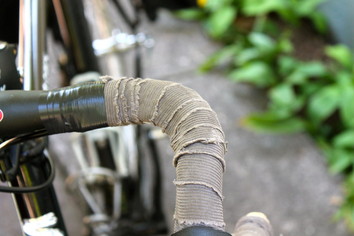 1. The first indicator is when the wrap starts to loosen and unravel. If the tape wasn't applied correctly this could happen before the material has actually worn out. At this stage you may simply be able to rewrap the bar. Loose bar tape seriously compromises your ability to ride purposefully and safely.
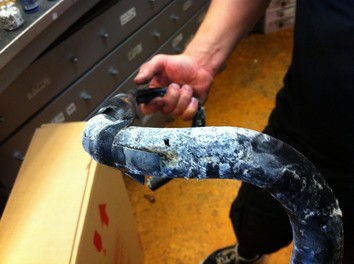
2. When bar tape gets old it may become more brittle and sometimes tends to bind to the handlebars. It then becomes a matter of "peeling" it off in sections. Don't let it go this far. Tape at this stage will often feel smooth and quite firm. When it gets this old it has already lost a lot of the qualities it was designed for, like comfort and grip.

TIP: Double taping. One way to help with hand and wrist comfort issues is to double tape. This is obviously using two roles of bar tape on top of each other. It creates a very fat handlebar, but increases comfort a lot. Another method is to run a strip of leftover tape along the top section of the bar (where your hands spend a lot of time), and tape over it. I did this for riding over very rough pot-holed roads on one of my longer training rides and it works a treat. (Helps as I ride without gloves).
3. If you are into triathlons or use your bike on a stationary trainer a lot, get your bar tape checked fairly regularly. Sweat and salt water collect in the bar tape material and can lead to corrosion related issues in other bike components. I have seen some nightmares revealed after peeling back old sweat and salt filled tape.
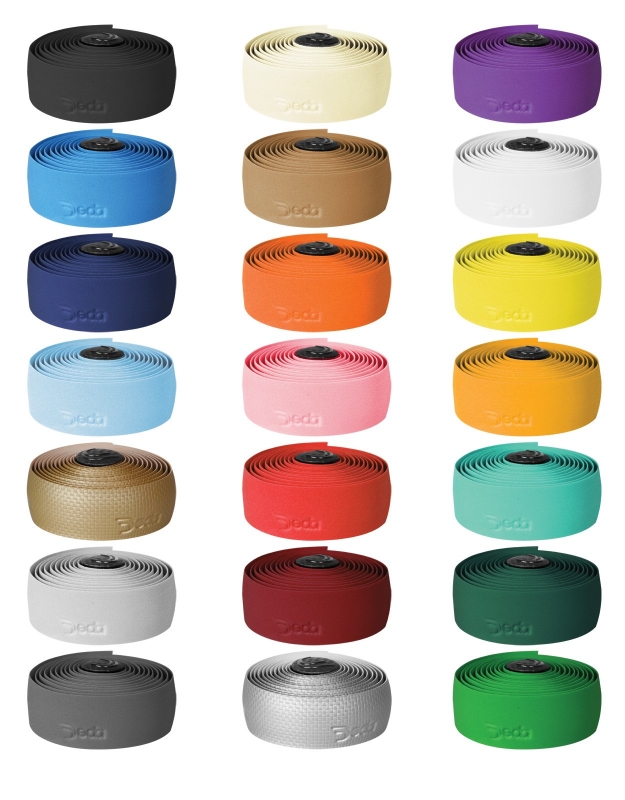 4. One of the things I love about retaping my bars is that it is an inexpensive way to add a bit of customization to your bike for minimal cost. Every time I retape I also change the color scheme. Sounds a bit shallow, but isn't road riding all about the look?
Some brands: Cinelli, 3T, fi'zi:k, Bike Ribbon, Velox, LizardSkins
TIP: With colors, unless you are a regular bike washer, I recommend avoiding white tape. It looks great for sure, but after about three rides that white will be a dirty off-white and it's all downhill from there. Even with fastidious cleaning you will never get the original look back.
5. When you have decided to replace the tape it's time to go shopping! There are multitudes of options available, but the three key qualities are comfort, durability and grip. If you want to focus on comfort, look for cork or gel tape (or both!). This type will be a bit thicker and springier to give your hands a little more protection from the constant vibration.
Other tape types may be more minimal in comfort, but are useful for those who like to hold onto a thinner bar without the extra bulk of padding. Just wear a good set of gloves with gel.
DIY TIPS:
There is plenty of information online about wrapping a road bike handlebar. I have found it is a matter of practice makes perfect. Some keys points to remember:
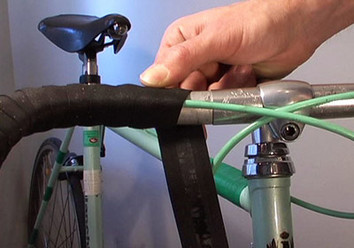
- Start at the ends of the bar and work your way up the drops, around the levers to a point an inch or two from the stem. Make sure there is some tape hanging over the end of the handlebar so the plug has something to grab onto.
- When sitting on the bike looking ahead, wrap the left bar in a clockwise direction and the right bar anti-clockwise. This makes certain the action of holding the bar while riding won't unravel the tape.
- When wrapping, overlap the tape by approximately a third of its width.
- Tape comes supplied with an extra strip to wrap around the clamp at the base of the hoods. This helps to cover up any gaps when wrapping this more complicated area. With practice (or with great care) it becomes unnecessary.
- When finishing off, try to cut the tape at an angle so the edge lines up parallel to the stem. This makes for a really neat finish.
Keep an eye out for BikeRoar's in depth look at installing bar tape in the future.
Let us know your tips and experiences with bar tape in the comments section below.