Descending through a corner
Vision is often overlooked when descending. When to brake, how much should I lean the bike, which pedal is supposed to be up, am I going to slide out...? There's a lot to process and all going as fast as a car in less than a millimeter of material between you and the human belt sander beneath you. There is however, one very important technique that is the basis for safe a fast descending through corners. It's your vision. All too often we end up looking straight in front of our wheel as to think that we can react to the smallest bump or rock that is going to take us out, all forgetting the most important thing of all, "where am I going again."
The best place to look when descending through a corner is the exit. It amazes me everytime I fly confidently through a switchback that by looking further down the road actually makes me safer and I have pulled through with less brake and more momentum that if I had been looking straight down (or off at the vista beside me). Next time you are out on a familiar road give it a try. Look as far around the corner as you can and pleasantly exit with a clear vision of what's down the road.
Strava, or it didn't happen
We've all heard the story of the big fish that got away. But seriously! If you don't have the picture to prove it then did it really happen or is it just a joke. We believe the same thing goes with cycling. Oh...you really hit 60mph on that granny hill on lookout road? Sure you did bro! But the moment you whip out your strava segment on your smartphone and proudly point to the leader board suddenly all your beers for the rest of the night are paid for.
Now Strava isn't there just to boast like so many forums want you to believe. It's true power goes well beyond stoking that already inflated ego at the local bar. Use it to keep yourself accountable. Set individual goals and watch your improvements through the course of a season. Share your rides with a coach or riding buddy to motivate them to come see that new trail you found next weekend. Use it how you like but always remember...if it's not on Strava...did it really happen?
Yield to uphill riders
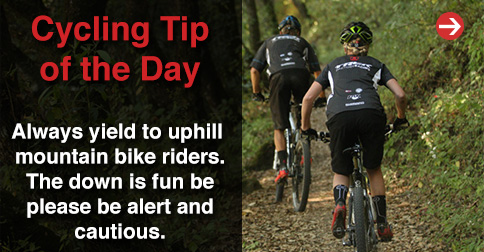
There are numerous opinions on proper trail etiquette when it comes to multiple users on the same trail. However, there is one constant that has remained and continues to be stressed regardless of opinion. That is of course yielding to uphill riders. We all love the descent, the effortless pull of gravity, the pump and flow to maintain speed, the wind in our sweat drenched hair...and the agony of slamming on the brakes and unclipping to wait for a struggling climber to trudge past. Would that person have done the same courtesy of stepping aside as you did. In most cases the answer is YES! My personal experience on trail has shown me that the strong effort of your local trail advocacy group is cutting through the fog of downhill dominance.
The main reason we display this behavior is that it is much more difficult to stop mid climb and get the momentum going again. When gravity is working with you it is far easier to coast for a second and feather the brakes until you can get clipped back in and focus on the next obstacle down trail. This also provides a reason for all trail users to be more vigilant of their speed and control it in a way to anticipate an on coming rider around the next switchback. In the end, if you really don't want to stop and be kind to the climbers there are numerous trips to the lift service trails awaiting.
Ride through mud puddles
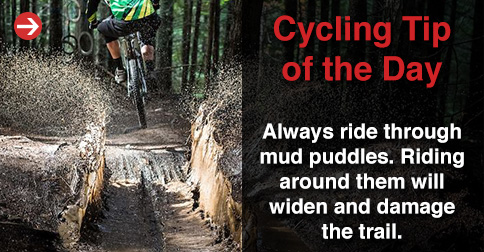
This may be one of the most important trail rules promoted by your local mountain bike organization. Now before I get into too much detail it is recommmended that if a trail is full of mud and water you should seriously consider not riding at all! Not only will it cause damage to the trail but your bike will also need significant cleaning and maybe a few replacement parts.
Sometimes, after a trail dries out and is ready to be ridden, there may still be a few puddles. Ride through these small puddles instead of riding around them. When you ride around you create a larger trail than originially intended. There is a balance to developing new trail systems and conserving the space we use to enjoy the sport we love. Plus...it makes you feel more like a kid when splashing through and getting spray all over the place.
Buying cycling shoes

Buying a new pair of cycling shoes can be daunting task. Of course every shoe company will market and boast about the comfort and performance THEIR design will achieve for you. But after four shop visits and 12 pairs of shoes later, you're still not sure what is going to be the best option. After all, once those cleats are fitted and you are off riding you can't always return them.
Getting the fit right should always begin at your local bike shop. And the best shops have all the tools and knowledge to guide you in the right direction. Remember in the end, only you can feel what you feel and it may take some time to sense the best fit. How much time? About 30 minutes. Yes, you heard me right. You will most likely own these shoes for years and spend hours upon hours wearing them so go into this process with all the time you need. As you initially try on a pir of cycling shoes you'll feel the basics. Can I wiggle my toes? Do you feel the end? Does my heel slip out (remember that a little heel movement is ok as the sole of the shoe is very stiff)? After about 30 minutes of wearing the shoe you'll begin to feel the little details. Your foot will have heated up the material and it may soften. Or maybe that stitch near your pinky toe is starting to run.
In the end, the best advice we can give you is to take your time. Try on a variety of shoes that work for your foot shape. Don't buy by brand, buy the shoe that feels best.
Want a detailed tutorial of exactly what to do when buying cycling shoes?
Check out our article: 10 tips to choosing the right cycling shoes
How to lube your chain
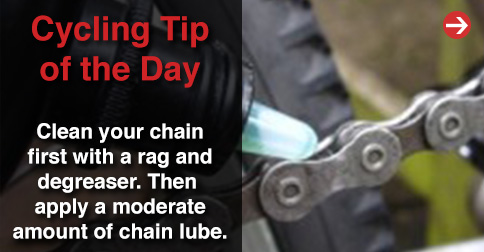
As common as most of us might think this type of maintenance is nessesary, dry and dirty chains squeek by us much too often. When is it really time to freshen up that lube? Ask yourself, "Can I hear my chain?" If the answer is "YES" (maybe it's buzzing, squeeking, rusted...) time to break out the old bottle of lube. While pedaling, if your chain makes little to no noise you should be good to go for now.
Unlike rebuilding a suspension fork, lubing your chain is realatively easy and can be done at home without any tools. For the best results get it clean before adding more lube. Don't just go out and put anything on it. Your local bike shop will have great recommendations for the best degreaser and lube to match your bike and where you ride. There is a reason formulas are made specificially for the heat and speed of a bicycle chain, to guarantee the best life and performance you should go straight for the best stuff.
Want a detailed tutorial of exactly what to do?
Check out our article: How to clean and lube your chain in 5 steps.